


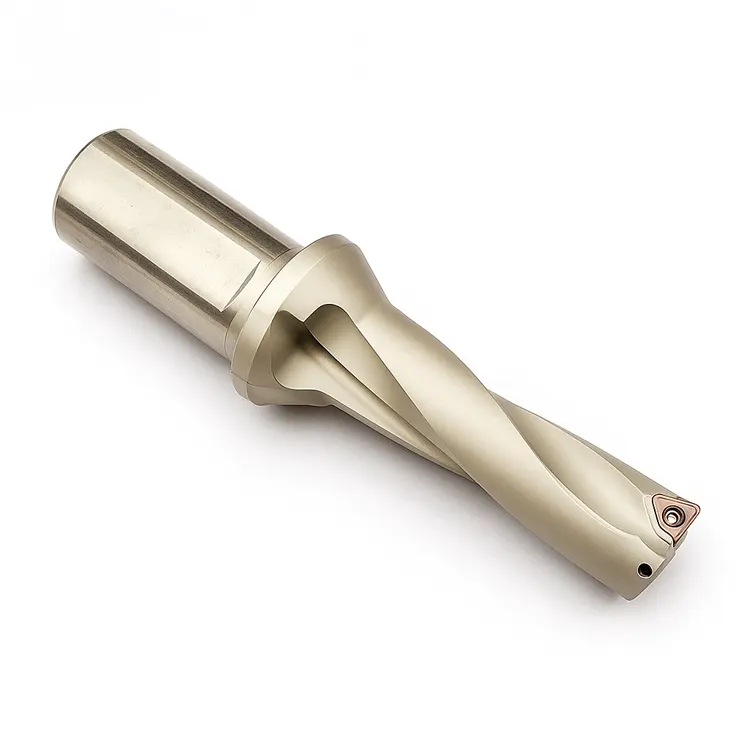


How Often to Change Drill Inserts in CNC
The most expensive sound in a machine shop is the “pop” of a drill failing deep inside a part. That sound signifies not just a broken insert, but potential damage to the workpiece and the destruction of a drill body often worth hundreds of dollars.
Determining exactly how often to change drill inserts in CNC operations is a balance between maximizing tool economy and ensuring process security. Change them too early, and you waste budget on consumables. Change them too late, and you risk catastrophic failure.
At AccurateCut, we advocate for a data-driven approach. Instead of guessing or running a tool until it breaks, manufacturers should rely on specific visual, auditory, and machine feedback metrics to establish a predictable tool life.
The “0.3mm Rule”: Visual Inspection Standards
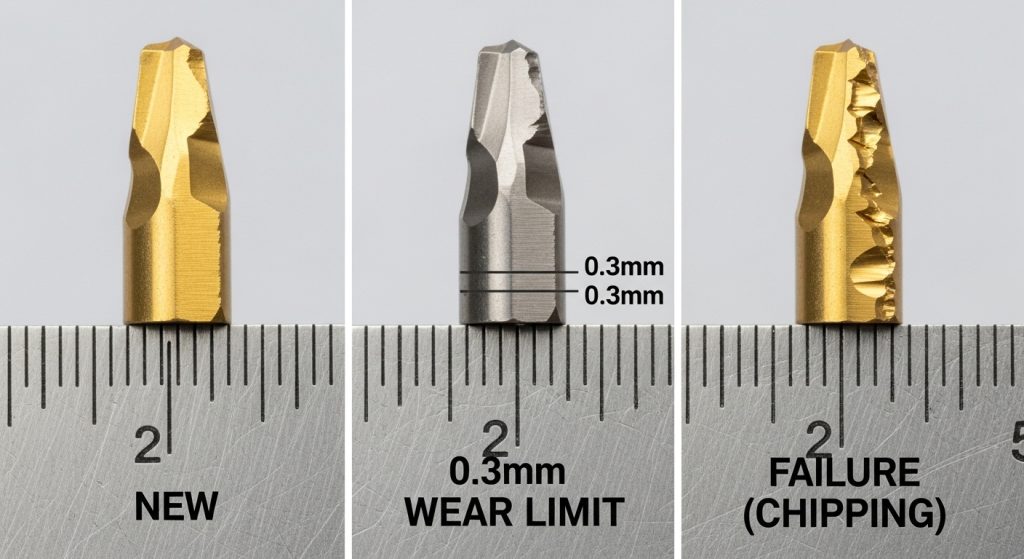
The industry standard for retiring an indexable drill insert is based on Flank Wear (VB). As the insert cuts, the abrasive action of the metal wears down the cutting edge, creating a flat “land” on the side of the insert.
The Limit
AccurateCut recommends changing inserts when the flank wear reaches 0.3mm (0.012″). Beyond this point, cutting forces increase exponentially, heat generation spikes, and the risk of the carbide fracturing rises dramatically.
Distinguishing Wear from Failure
It is critical to distinguish between normal wear and abnormal failure.
- Normal Wear: A smooth, even abrasion along the cutting edge.
- Chipping: Small pieces of the edge breaking off. This is not normal wear; it is a sign of instability. If you see chipping, do not just change the insert—investigate why drill inserts break to solve the root cause. If chipping is a recurring issue, you may need to learn how to prevent chipping in drill inserts by adjusting feeds or grades.
Machine Feedback: Listening to the Data
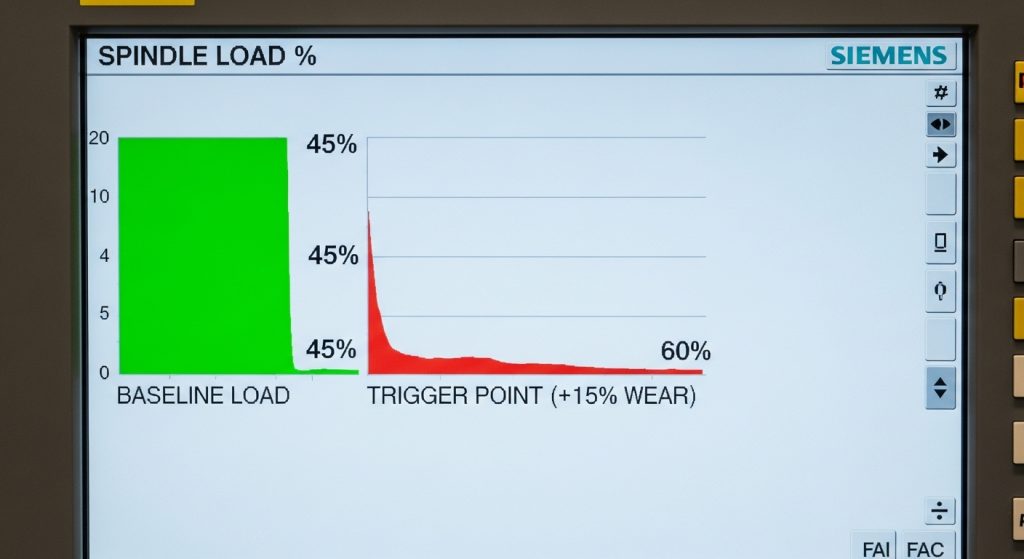
In a modern CNC environment, you do not need to rely solely on your eyes. The machine itself provides the most reliable indicator of tool condition: the Spindle Load Meter.
The 15% Rule
A sharp insert cuts cleanly. A dull insert rubs and pushes. As the edge dulls, the spindle motor must work harder to maintain the commanded RPM.
- Baseline: Note the spindle load percentage when the inserts are brand new (e.g., 45% load).
- The Trigger: When the load increases by 10-15% over the baseline (e.g., reaching 50-52%), the inserts have reached the end of their effective life.
Setting a “Tool Load Monitor” limit on your CNC controller is the most effective way to automate this process and prevent crashes.
Auditory and Physical Signs
Experienced machinists often “hear” a tool failing before they see it. However, relying on hearing alone is risky in loud shop environments.
- Sound: A healthy drill produces a steady, low-pitched rumble. A high-pitched scream indicates rubbing (flank wear), while a crunching sound suggests chip packing.
- Surface Finish: If the hole finish degrades, appearing torn or rough, the inserts are pushing material rather than shearing it. This is a primary symptom when diagnosing poor hole surface finish.
- Hole Size: As the outer insert wears, the drill begins to cut slightly undersize or creates a tapered hole.
The “Safe Limit” Calibration Protocol
To stop guessing, AccurateCut recommends running a controlled test to calibrate your Tool Life Management (TLM) counters.
- Start Fresh: Install new inserts and ensure you are using a reliable drill insert supplier to guarantee consistency.
- Run 100 Holes: (Or a standard batch). Inspect the inserts under a loupe.
- Continue Intervals: Check every 50 holes until you see 0.3mm of wear or a 15% load increase. Let’s say this happens at 800 holes.
- Set the Buffer: Set your machine’s tool life counter to 90% of that number (720 holes).
This 10% buffer provides a safety margin for material inconsistencies and prevents you from running on the “ragged edge” of failure.
Material-Specific Variables
The material you are drilling dictates the wear pattern and the change frequency.
- Steel (ISO P): Typically shows predictable, linear flank wear. The 0.3mm rule applies strictly here.
- Stainless Steel (ISO M): Prone to work hardening. If you run these inserts too long, the heat causes sudden plastic deformation. Change these earlier to ensure edge sharpness.
- Aluminum (ISO N): Wear is less about abrasion and more about “Built-Up Edge” (aluminum welding to the carbide). If you see aluminum sticking to the edge, the coating has failed.
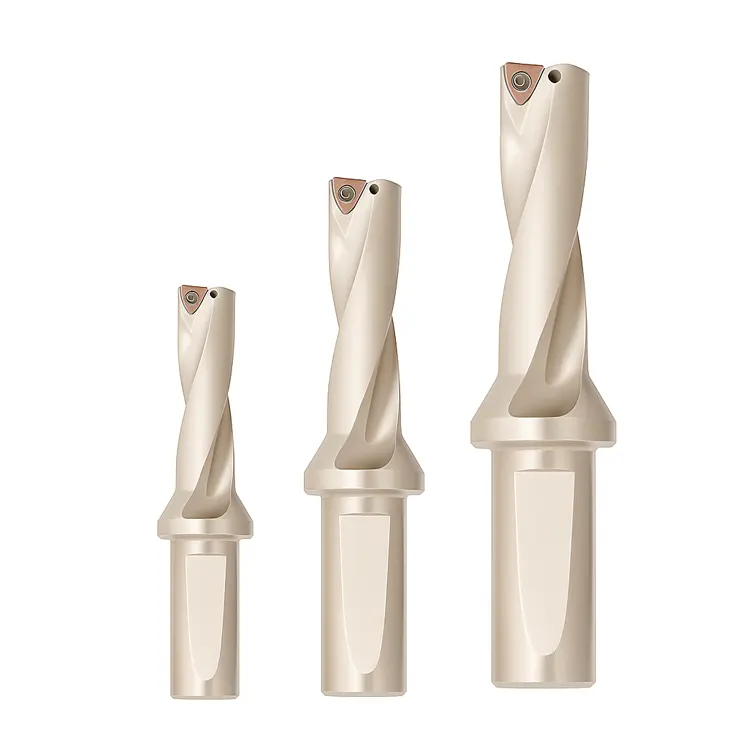
The Economics of Drill Body Protection
A common mistake is trying to squeeze an extra 50 holes out of a set of inserts to “save money.” This is false economy.
- The Cost: A set of inserts costs roughly $20-$40. A high-quality indexable drill body costs $400-$800.
- The Risk: If an insert breaks inside the hole, it often destroys the insert pocket of the drill body.
Replacing inserts before they fail is an insurance policy for your drill body. For more strategies on protecting your tooling assets, refer to our industrial drill maintenance buying guide.
Conclusion
Predictability is the ultimate goal in CNC machining. By combining visual standards (0.3mm wear), machine data (spindle load monitoring), and a calibrated tool life counter, you can eliminate the guesswork of when to change inserts.
Do not wait for the noise. Change the tool while the process is still stable. Ensure your tool crib is stocked by checking what to check before buying drill inserts to maintain a consistent inventory.
Frequently Asked Questions (FAQ)
Should I change both inserts at the same time?
Yes. Even if the inner insert looks better than the outer insert, changing only one creates an imbalance in cutting forces. This imbalance leads to vibration and can cause premature failure of the new insert. Always change them as a pair.
Why does my outer insert wear faster?
The outer (peripheral) insert runs at a much higher Surface Speed (SFM) than the inner insert, which runs at near-zero speed at the center. Because heat is generated by speed, the outer insert is subjected to significantly higher thermal loads and abrasive wear.
Can I rotate the inserts to a different corner?
Yes, most indexable drill inserts are designed with 2, 3, or 4 cutting edges (indexes). You should rotate them to a fresh corner rather than discarding them. However, ensure the pocket is clean before seating the new corner, and follow the proper torque drill inserts protocol.
How do I distinguish between chipping and wear?
Wear is a smooth, dull patch on the edge. Chipping looks like jagged, broken glass. If your inserts are chipping rather than wearing, you may need a tougher grade or a more rigid drill body. Learn how to compare indexable drill brands to find a more stable solution.
Does stopping the machine to check inserts shorten their life?
In materials like Stainless Steel, yes. Interrupting the cut can cause work hardening at the bottom of the hole. It is better to use Spindle Load monitoring or check the inserts between parts rather than mid-hole.