


Material-Based Drilling Guides
The most expensive sound in a machine shop isn’t the crash of a spindle—it’s the silence of a scrapped part sitting in the bin. In our experience at Accurate Cut, the most common cause of part failure during secondary processing isn’t a lack of machine capability. It is the mismatch between drilling parameters and material properties.
Drilling appears deceptively simple: spin the tool and push. However, treating 304 Stainless Steel the same way you treat 6061 Aluminum is a guaranteed recipe for work-hardened surfaces, broken tooling, and out-of-tolerance features. Precision isn’t about guessing; it’s about understanding the physics at the cutting edge.
This guide breaks down the specific drilling strategies for the most common manufacturing materials. We will cover the necessary adjustments in speed, feed, and geometry that transform a rough, oversized hole into a precision feature.
The Physics of Drilling: Hardness vs. Heat
Before diving into specific alloys, it is critical to understand the “Heat Budget.” When a drill bit cuts material, heat is generated by friction and plastic deformation. In an ideal scenario, approximately 80% of that heat should be carried away by the chip, leaving the tool and the workpiece relatively cool.
If you are not creating a proper chip, you are not removing heat.
The Golden Rule of SFM
The relationship between Surface Feet per Minute (SFM) and material hardness is inverse.
- Harder Materials: Require lower RPM (speed) but often higher feed pressure (to penetrate the surface).
- Softer Materials: Allow for higher RPM but require specific chip evacuation strategies to prevent clogging.
The operator’s primary visual cue is the chip itself. In ductile materials like mild steel, you want tight, consistent curls (often called “6s and 9s”). Long, stringy chips indicate a lack of chip breaking, which creates safety hazards and wraps around the spindle. Dust or powder (in metals) usually indicates the feed rate is too low—you are rubbing the material rather than cutting it.
Drilling Ferrous Metals (Steels & Iron)
Ferrous metals cover a vast range of machinability. A standard High-Speed Steel (HSS) bit might survive low carbon steel, but it will fail almost instantly in hardened tool steel.
Low Carbon and Mild Steel
For standard 1018 or A36 steel, a standard 118° point angle HSS drill is generally sufficient. These materials are forgiving. The goal here is efficiency. We typically recommend running these at 80-100 SFM. If you push too hard, the primary risk is hole deviation (the drill walking), rather than immediate tool failure.
Stainless Steel (The 300 Series Challenge)
Stainless steel, particularly the 300 series (304, 316), presents a unique challenge: Work Hardening.
If the drill bit dwells in the cut—spinning without advancing—the friction heats the material, changing its localized structure to be harder than the drill bit itself. Once this “glaze” forms, the drill will scream, burn, and fail to penetrate.
To drill stainless successfully:
- Slow Down: Reduce your RPM (typically 40-50 SFM).
- Increase Feed: You must maintain constant, aggressive feed pressure. The cutting edge must stay under the work-hardened zone created by the previous rotation.
- Cobalt is King: We recommend using Cobalt (M35 or M42) drill bits rather than standard black oxide HSS. Cobalt resists the high heat generated by nickel-heavy alloys.
Hardened Alloys and Tool Steels
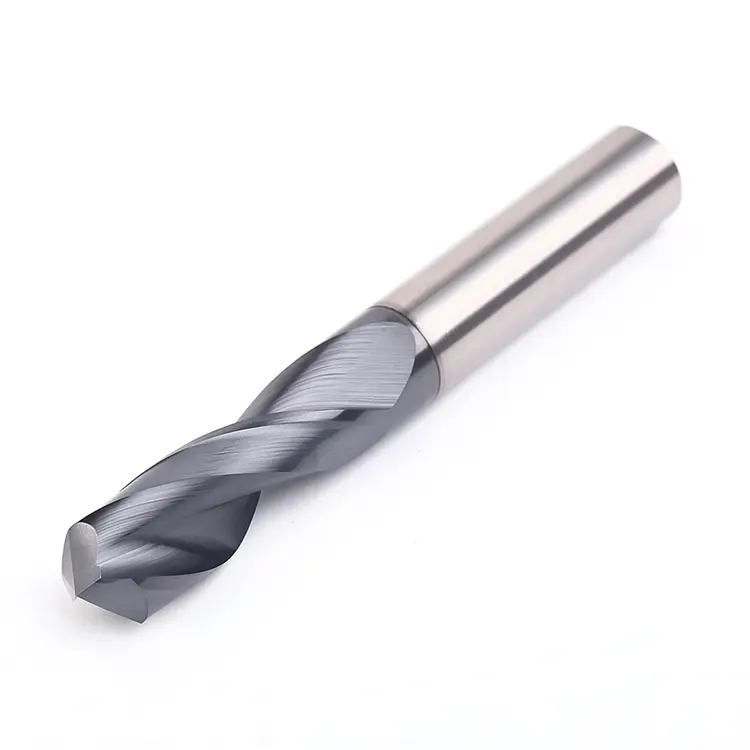
Once material hardness exceeds 30-35 HRC (Rockwell C), standard HSS is ineffective. For hardened tool steels or heat-treated shafts, Carbide tooling becomes necessary. To further manage the extreme heat generation in these alloys, applying the correct drill insert coatings can significantly extend tool life. While Carbide is brittle and requires a rigid setup (no hand drills), it maintains hardness at high temperatures.
Drilling Non-Ferrous Metals
Non-ferrous metals like aluminum, brass, and copper do not rust, but they present their own machining quirks—primarily “gumminess” and “grabbing.”
Aluminum
Aluminum is soft, but it is sticky. As the drill cuts, the material heats up and wants to weld itself to the flutes of the drill (built-up edge). Once the flutes clog, the drill becomes a solid rod, and the pressure will snap it.
- Geometry: Use “bright finish” or polished flutes to reduce friction. High helix angles (parabolic flutes) help eject chips rapidly out of deep holes.
- Lubrication: Unlike cast iron which can be drilled dry, aluminum requires lubrication to prevent material adhesion. Even a simple mist coolant prevents the chips from welding to the tool.
Brass
Brass behaves differently than most metals. It is “grabby.” Because it is relatively soft but shears easily, a standard sharp drill bit creates a screw-effect, sucking the drill bit into the material faster than the machine intends. This often pulls the workpiece out of the vise or breaks the tool.
At Accurate Cut, when processing brass components, we modify the cutting edge by “dubbing” or flatting the rake angle to 0°. This scraping action prevents the drill from digging in self-aggressively.
Copper
Copper is a nightmare for heat conductivity and ductility. It doesn’t want to shear; it wants to tear. It is incredibly abrasive to tool edges despite being soft. You need very sharp tools, high speed, and a lubricant that is formulated to reduce friction, or the hole will end up undersized as the copper expands from heat and then shrinks back down when the drill is removed.
Drilling Plastics and Polymers
Drilling plastic requires a complete shift in mindset. In metal, we generate heat to shear the chip. In plastic, heat destroys the part.
The Melting Point Challenge
If you run a drill at metal-cutting speeds in Nylon or ABS, the friction melts the plastic. The molten plastic then re-solidifies around the drill bit, seizing it instantly. The result is often a cracked part or a drill bit snapped off inside.
Acrylics vs. Polycarbonates
Acrylic (Plexiglass) is brittle. As the drill tries to exit the bottom of the material, it pushes against the remaining thin layer. Instead of cutting, it blows out the bottom, causing “crazing” or large cracks.
- Geometry: A standard 118° point acts like a wedge, splitting the plastic. A sharper 60° or 90° point puts less radial pressure on the hole walls.
- The Exit: Slow the feed rate dramatically as you approach the bottom of the hole to gently shave off the final material.
Coolant for Plastics
Be careful with liquid coolants. Some cutting oils contain chemicals that react with polycarbonates, causing stress cracking days after the part is finished. An Air Blast is often the best coolant for plastic—it clears chips and cools the tool without chemical interaction.
Drilling Composites and Exotics
Fiberglass and Carbon Fiber
These materials are abrasive and structured in layers. The primary failure mode here is Delamination—where the force of the drill pushes the layers apart rather than cutting them.
- Tooling: HSS will dull in seconds due to the abrasive glass/carbon fibers. Diamond-coated or Solid Carbide tools are mandatory.
- Strategy: High RPM and low feed pressure help grind through the fibers rather than pushing them. Using a backing plate (sacrificial material clamped to the back) prevents the exit side from splintering.
Titanium and Inconel
These “superalloys” retain strength at high temperatures and have low thermal conductivity. The heat doesn’t go into the chip; it stays in the tool.
- Approach: We approach Titanium similarly to stainless but with even more emphasis on heat management.
- Peck Drilling: This is non-negotiable. You must retract the drill frequently to break the chip and allow coolant to reach the cutting tip.
Coolant and Lubrication Strategy
Lubrication is not just about making things slippery; it is about thermal stability and chip evacuation.
| Coolant Type | Best Application | Why? |
| Flood Coolant | Stainless, Steel, Titanium | Maximum heat removal and chip flushing. |
| Mist/MQL | Aluminum, Non-Ferrous | Prevents chip welding without the mess of flood. |
| Air Blast | Plastics, Cast Iron | Cools without thermal shock or chemical reaction. |
| Cutting Paste | Tapping, Reaming | High lubricity for slow-speed, high-pressure cuts. |
Troubleshooting Common Drilling Defects
Even with the right charts, things go wrong. Here is how our team diagnoses issues on the shop floor:
Oversized Holes (Bell-Mouthing)
If the hole is larger at the top than the bottom, or generally oversized, the drill point is likely off-center. If the cutting lips are not equal in length, the drill will orbit effectively boring a larger hole.
- Fix: Resharpen the drill ensuring equal lip length and angle. Use a spot drill to start the hole accurately.
Rough Finish
If the inside of the hole looks like a screw thread or feels rough:
- Feed Rate Too High: You are pushing the drill faster than it can cut.
- Dull Tool: The cutting edge is tearing material rather than shearing it.
Drill Breakage
Drills rarely break because they are “weak.” They break because of chip packing. If the flutes are full of chips, there is nowhere for new material to go. The pressure builds until the drill snaps.
- Fix: Implement a peck cycle (Retract the drill fully every 1-3x diameter of depth).
Conclusion
Precision drilling is a variable equation where the material dictates the variables. A 1/2″ hole in aluminum requires a completely different physical approach than a 1/2″ hole in 316 Stainless Steel. By respecting the material’s hardness, thermal conductivity, and structure, you ensure repeatable, high-tolerance results.
At Accurate Cut, we understand that the integrity of the final part depends on the quality of the processing. Whether you are dealing with standard mild steel or exotic aerospace alloys, applying the correct physics to the process is the only way to guarantee success.
If you are facing challenges with material processing or need a partner who understands the nuance of precision cutting, reach out to our team.
Frequently Asked Questions
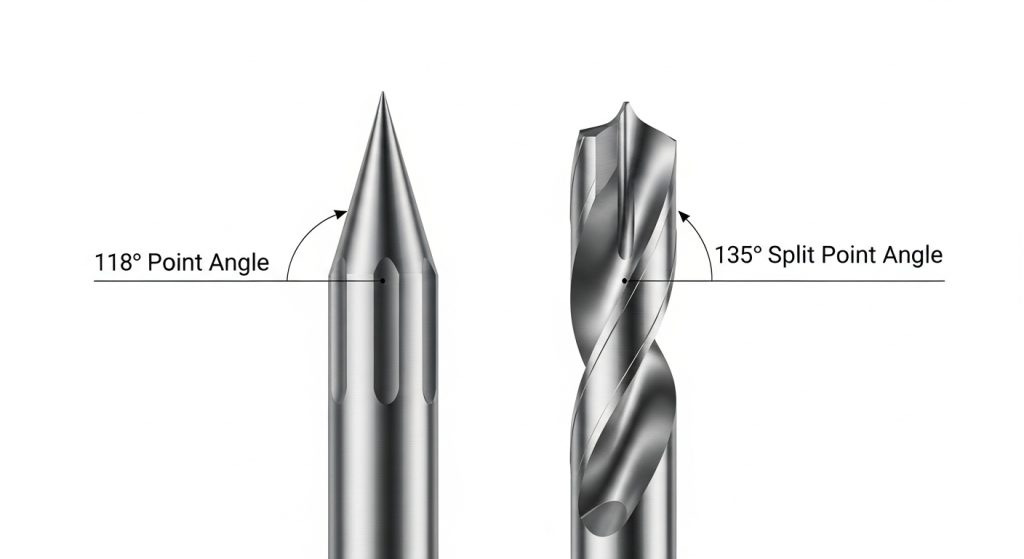
What is the best drill bit angle for stainless steel?
For stainless steel and harder alloys, a 135° split point is superior to the standard 118° point. The flatter angle engages more cutting edge at once, reducing the pressure per square inch, and the “split point” prevents the drill from walking on the hard surface, allowing for easier penetration without a center punch.
How do you determine the correct RPM for drilling?
The formula is RPM = (SFM × 3.82) / Drill Diameter. SFM (Surface Feet per Minute) changes by material (e.g., Aluminum is ~300 SFM, Stainless is ~50 SFM). As the drill gets larger, your RPM must get slower to maintain the same cutting speed at the outer edge of the bit.
Why does my drill bit squeal when drilling metal?
A high-pitched squeal usually indicates rubbing. This happens when the RPM is too high or, more commonly, the feed pressure is too low. The drill is skimming over the surface rather than biting into it. This creates friction and heat, dulling the tool instantly. Apply more pressure to engage the cut.
Can I use the same drill bit for plastic and metal?
Technically yes, but it is not recommended for precision work. A drill used on metal will dull slightly; while still fine for steel, that slight dullness will cause melting and cracking in plastic. Furthermore, standard metal drills often have too aggressive of a point angle (118°) for delicate acrylics.
What is peck drilling and when should I use it?
Peck drilling involves drilling a short distance, retracting the drill to clear chips, and then going back in. You should use this whenever the hole depth exceeds 3x the drill diameter. It prevents chips from packing in the flutes, which is the number one cause of drill breakage in deep holes.